Set up your clinic & branding
Add your clinic details, logo, and signature so every document you print looks like it came from you.
Steps
- Open Settings from the sidebar.
- Under "Doctor profile", fill in your full name, specialisation, qualifications, and registration number — the registration number and council are required before you can print a bill.
- Under "Hours", set your clinic name, phone, address, and UPI ID. The UPI ID is what powers the payment QR code on every bill — leave it blank and bills print without one.
- Set your consultation and follow-up fees so the Payment tab can auto-fill an amount later.
- Fill in your weekly working hours — leave a day blank to mark it closed.
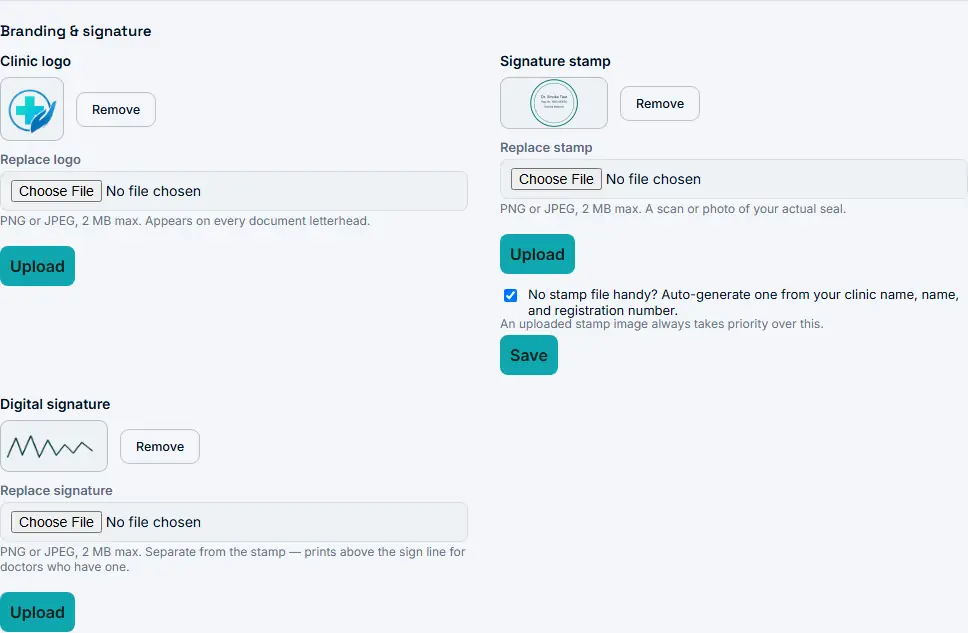
- Under "Branding & signature", upload your clinic logo (PNG or JPEG, 2 MB max). Until you do, documents use the default Clivera logo.
- Upload a signature stamp image, or turn on "Auto-generate one from your clinic name, name, and registration number" if you don’t have a scanned stamp handy.
- Optionally upload a separate digital signature — it prints above the sign line, distinct from the stamp.
Done when
Your logo and signature/stamp show up in the Branding & signature section instead of the placeholders, and Settings shows "Saved."